A blog about technical art, particularly Maya, Python, and Unity. With lots of obscurantist references
We've Moved
The blog has been retired - it's up for legacy reasons, but these days I'm blogging atblog.theodox.com. All of the content from this site has been replicated there, and that's where all of the new content will be posted. The new feed is here . I'm experimenting with crossposting from the live site, but if you want to keep up to date use blog.theodox.com or just theodox.com
mGui updates in the offing...Changes on the way for mGui, the maya Gui framework
For those of you who’ve been using mGui to speed up and simplify your Maya gui coding, there are some interesting changes on the horizon. Although I’m not entirely ready to release the changes I have in mind they are mostly sitting in their own branch in the Github repo.
The upcoming version introduces some new idioms - in particular, it gets rid of the need for explicitly setting keys on new controls to get access to nested properties. In the first version of mGui you’d write something like this:
withgui.Window('window',title='fred')asexample_window:withVerticalForm('main')asmain:Text(None,label="Items without vertex colors")lists.VerticalList('lister').Collection<bind()<boundwithHorizontalStretchForm('buttons'):Button('refresh',l='Refresh')Button('close',l='Close')
With the new refactor that looks like this:
withgui.Window('window',title='fred')asexample_window:withVerticalForm()asmain:Text(label="Items without vertex colors")lister=lists.VerticalList()lister.collection<bind()<boundwithHorizontalStretchForm()asbutton_row:refresh=Button(label='Refresh')close=Button(label='Close')
The big advantage here is that those local variables are not scoped exclusively to the layout context managers where they live, which makes it easy to control when and where you hook up your event handlers: In the above example you could defer all the bindings and event handlers to the end of the script like this:
withgui.Window('window',title='fred')asexample_window:withVerticalForm()asmain:Text(label="Items without vertex colors")lister=lists.VerticalList()withHorizontalStretchForm()asbutton_row:refresh=Button(label='Refresh')close=Button(label='Close')lister.collection<bind()<boundrefresh.command+=refresh_defclose.command+=close_def
So far I’m really liking the new idiom, particularly eliminating the extra quotes and redundant None keys. However this is a minorly breaking change: in some cases, old code which relied on the key value to name and also label a control at the same time will when the keys become redundant. Moreover I bit the bullet and started to refactor the entire mGui module to use correct pep-8 naming conventions – in particular, member variables are no longer capitalized. So if you have code outside of mGui this will introduce some issues. When I converted my own code, most of the changes could be done with a regular expression but there were a few danglers.
I think the changes are worth the effort, but I’d be really interested in hearing from users before trying to bring the new mGui branch back into the main line. It should actually be possible to write a script that fixes most existing code automatically, that’s something we could refine collaboratively.Please let me know in the comments or by opening an issue on the GitHub site if you have comments or plans. As always, bug fixes and pull requests always entertained!
The Maya Callbacks Cheat Sheet post started out as an effort to explain the design the event system in mGui - but it quickly turned into it's own thing as I realized that the vanilla Maya system remains confusing to lots of people. With that background out of the way, I want to return to events proper, both to explain why they work the way the do in mGui and also how they can be useful for other projects as well (I use them all over the place in non-GUI contexts).
...and, because it's got the word 'event' in it, I'm going to throw in a lot of irrelevant references as I can manage to The Crushah!
Update 5/7/14: Added a note on closures and lambdas
In All Your Base Classes, I suggested that we can do better than the standard callback mechanism for doing Maya event handling. The limitations of the default method are something I've complained about before, and if you follow these things on TAO or CGTalk or StackOverflow it seems pretty clear that a lot of other people have problems with the standard Maya code flow too.
I was planning on devoting the next big post to the event mechanism in mGui . However as I did the spadework for this post I decided it was better to split it up into two parts, since a lot of folks seem to be confused about the right way to manage basic Maya callbacks. Before moving fancy stuff, it's a good idea to make sure the basics are clear. Most vets will already know most of what I'm going over here, but I found the time spent laying it out for myself a useful exercise so I figured it would be worth sharing even if it's not revolutionary.
If you're tired of boring old light-grey-on-dark-grey text, you'l'l be pleased to know that the Maya text widget actually supports a surprising amount of HTML markup. Which means that instead of this:
You set peoples eyeballs on fire like this:
This is a single cmds.text object with it's label property set to an HTML string.
The original version was 237 lines of code, not counting the header comments. The mGui version was 178 without the header, so about 25% shorter overall. There are about 80 lines of unchanged, purely behind-the-scenes code which didn't change between versions, so the real savings is more like 45%. Plus, the original sample included some functions for formLayout wrangling so real savings might be a little higher for more old-fashioned code.
Like I said last time, the mGui package is still evolving so it's still very much in a "use at your own risk" state right now... That said, I'd love to get comments, feedback and suggestions.
Updated 4/11/2015: fixing code samples that had gone missing thanks to Blogger templates....
In Rescuing Maya GUI From Itself I talked in some detail about how to use descriptors and metaclasses to create a wrapper for the Maya GUI toolkit that, er, sucks less than the default implementation. I also strove mightily to include a lot of more or less irrelevant references to Thunderbirds. This time out I want to detail what a working implementation of the ideas I sketched out there looks like.
I think this time the irrelevant thematic gloss will come from All Your Base Are Belong To Us jokes. Because (a), we’re talking about base classes, (b) what could be more retro and 90’s than Maya’s GUI system, and (c) For Great Justice, Make All Zig!
I’ve put my current stab at a comprehensive implementation up on Github, in the form of the mGui project , where you can poke at it to your heart’s content. The whole project is there, and it’s all free to use under the MIT, ‘do-what-thou-wilt-but-keep-the-copyright-notice’ license. Enjoy! I should warn you, though, that this is still W.I.P code, and is evolving all the time! Use it at your own risk – things may change a lot before its really ‘ready’.
All Your Properties Are Belong To Our Base Class
What we’re shooting for is a library that provides all of Maya;’s GUI widgets in a clean, pythonic way without making anybody learn too much new stuff. If all goes well, the result is a cleaned up and more efficient version of things most of us already know. You can also treat this an template for how you might want to to wrap other aspects of Maya – say, rendering or rigging – in cleaner code.
From last time, we know we can wrap a Maya GUI component in a class which uses descriptors to make conventional property access work. The main thing we’re going to be delivering in this installment is a slew of classes that have the right property descriptors to replicate the Maya GUI toolkit. We’ll be using the metaclass system we showed earlier to populate the classes (if none of this makes sense, you probably want to hop back to the previous blog entry before following along).
To keep things simple and minimize the boilerplate, we’ll want to derive all of our concrete classes – the widgets and layouts and so on – from a single base. This helps the code simple and ensure that the features we add work the same way for the whole library. We’ll add a second class later to handle some details specific to layouts, but that will derive from the base class.
Before we look at the details of the base class, we should think a little more about the properties. In the last installment, we treated all properties the same way - as generic wrappers around maya.cmds. In a production setting, though, we want to distinguish between 3 types of properties:
Regular properties
These are just wrapped accesses to commands, like we demonstrated last week. They use the same ControlProperty class as we used last time to call commands on our GUI widgets.
Read-only properties
A small number of Maya GUI commands are read-only. It would be nice and more pythonic to make sure that these behave appropriately. So, ControlProperty has been tweaked with a flag that allows it to operate as a read-only property; otherwise it’s just the same descriptor we talked about last time out. ]
Callbacks
This one is a bit more involved. I’ve already complained about the weaknesses of the event model in Maya GUI. Cleaning it up starts with knowing which properties are callback properties and treating them accordingly.
To differentiate between these three types of properties, we need to tweak our old metaclass so that it can distinguish between regular properties, read-only properties, and event properties. Luckily the necessary changes are super simple - basically, we’ll take out the hard-coded list of properties we used before and allow every incoming class to declare a list of properties, a list of read-onlies, and a list of callbacks. (if you want to compare, the version from last time is here):
Somebody Set Us Up The Bomb!
Before getting into the nitty-gritty of our overall widget class, I want to make a side noted about the special properties used for the callbacks. These CallbackProperty descriptors are slightly different from the familiar ControlProperty. Their job is to de-couple the maya GUI widget from the commands it fires. They create special delegate objects which will intercept callbacks fired by our GUI objects.
If you have experimented a little with last time’s code, you may already have seen that it works just as well for callbacks and commands as for other properties. So you may wonder why we should bother to treat callbacks differently. What’s the point?
There are two main reasons this is a useful complication.
First, and most usefully, event delegates make it easier to add your callbacks after you lay out your GUI, rather than forcing you to interleave your code logic with the process of building forms and layouts. De-coupling the functional code form the graphic display makes for more readable and more maintainable code. It also makes it possible for you to reuse fairly generic layouts with different back ends. In pseodo-code:
Layout
   Layout
     ButtonA
     ButtonB
   Layout
     ButtonC
     ListA

ButtonA deletes selected item from ListA
ButtonB renames selected item from ListA
ButtonC adds new item to ListA
as opposed to
Layout
   Layout
     ButtonA.
        I'm going to delete something from the list when it gets made
     ButtonB
        I'm going to rename something in the list when it gets made
   Layout
     ButtonC
        I'm going to add something to the list when it gets made
     ListA
Keeping the functional bits separate makes it easy to, say, split the purely visual layout details into a separate file, but more importantly makes it clear whats an administrative detail and what’s actual functionality.
On a second, more tactical level the proxies also allow you to attach more than one function to a callback. It’s pretty common, for example, that you the act of want selecting an item in a list to select object in the Maya scene, but also to enable some relevant controls and maybe check with a database or talk to source control. Using an event proxy lets you handle those different tasks in three separate functions instead of one big monster that mixes up lots of UI feedback and other concerns.
If you’re familiar with QT you’ll rexognize that event delegates are basically QT “Signals”
So that’s why the extra complexity is worth it.
The actual workings of the proxy class are documented in the events.py file in the Github project; I’ll get back to how those work in a future post. Details aside, they key takeaway for right now is that this setup helps us move towards GUI code that’s more declarative. That’s the other reason why ‘button.label = “Reset”’ is better than cmds.Button(self.activeButton, e=True, l=’Reset’ – it’s not just less typing, it’s real value comes from treating the GUI layout as data rather than code,. That means you can concentrate on the actual work of your tools rather than the fiddly details of highlighting buttons or whatever.
Last but not least - by standardizing on the event mechanism we have an easy way to standardize the information that comes with the callback events for very little extra works. So, for example, all of the callbacks include a dictionary of keyword arguments when they fire - and the dictionary includes a reference to the widget that fired the event. That way it’s easy to write a generic event handler and not have to manually bind the firing control to a callback function. While we’re on the topic of de-coupling: Wouldn’t it be nice to separate out the details of the visuals (“what color is that button?”) from the structure of the forms and layouts?. Spoiler alert! This is a topic for a future post – but the curious might want to check out styles.py in the GitHub
Think ahead
How the hell are you going to explain THAT to your grandchildren? The obvious lession is THINK AHEAD
.
So, we’ve covered our improved property descriptors, and now it’s time to set up our base class.
This is a great opportunity to do some plumbing for more efficient coding. However it’s also a temptation – when the desire to sneak everything under the sun into your base classes is a recipe for monster code and untraceable bugs. This design should be as simple as we can make it.
Still, there are a couple of things that it would be nice to put into the base class - they are all very general (as befits base-class functions) and they are all common to any GUI tasks.
Tags
In most GUI systems, you can attach any arbitrary data you want to a widget. For example, you might want to have an array of buttons that all did the same thing with slightly different values, say moving an object by different amounts. In Maya you have to encapsulate the data into your command call:. With a tag attached to the buttons, on the other hand, you can write a script that just says ‘move the target by the amount in this button’s tag’, which is much easier to maintain and more flexible. And as we just pointed out, the event mechanism always sends a reference to the control which owns an event when it fires, so it’s easy to get to the right Tag when you want it.
A real name
Having explicit names for your pieces is very handy, particularly in large, deeply nested systems like a GUI..
In conventional maya coding the names are critical, since they are your only way of contacting the GUI after it’s built. They are also unpredictable, because of Maya’s habit of renaming items to give them unique path names. Luckily for us we don’t need to rely on the widget names from Maya, since we’re managing the GUI items under the hood inside our wrappers. This gets us off the hook for creating and managing variables to capture the results of every GUI command under the sun.
That said, names are still useful in a big complex system. So, to make it really clear how to find one of our wrappers inside a GUI layout it makes sense to ask for an explicit name passed in as the first argument - that way it’s totally clear what the control is intended to be. There are, of course, plenty of control you don’t really care about once they’re made: help text, spaces, separators and so on. To avoid making users have to invent names for those guys, we should let users pass in 0 or False or None as a succinct way of saying “I don’t care about the name of this thing”.
One minor note: I used Key as the name of the property so my IDE did not bug me for using in the Python reserved word ‘id’. Little things matter :)
Speaking of little things: there are some great tools in the Python language to make classes more efficient to work with. The so called ‘magic methods’ allow you to customize the behavior of your classes, both to make them feel more Pythonic and to express your intentions more clearly. Here are a couple of the things we can do with the magic methods in our base class:
__nonzero__
Speaking of that pass-in-zero-to-skip-names gimmick, one simple but super-useful thing we can do is to implement the __nonzero__ method. That’s what Python calls when you try the familiar
ifsomething:doSomething()
test. In our case, we know that all Maya GUI controls have the exist flag, and therefore all of our GUI classes will too. So, if our __nonzero__ just returns the exist property of our class instances, we can elegantly check for things like dead controls with a simple, pythonic if test.
__repr__
__repr__ is what Python calls when you need a printable representation of an object. In our case, we can pass back our underlying Maya GUI object, which is just a GUI path string. This way, you can pass one of our wrapper classes to some other python code that works on GUI objects and it will ‘just work’ – This is more or less what PyMel does for nodes, and it’s a great help when integrating a new module into an existing codebase. Like PyMel’s version there will be some odd corner cases that don’t work but it’s a handy convenience most of the time.
As a minor tweak, the __repr__ is also tweaked to display differently when the GUI widget inside a wrapper class has been deleted. This won’t prevent errors if you try to use the widget, but it is a big help in parsing error messages or stack traces.
__iter__
The next magic method we want to add is __iter__. It is the what python calls when you try to loop over a list or a tuple.
Now, a single GUI object obviously is not iterable. A layout like columnLayout, on the other hand, can be iterated since it has child controls. By implementing __iter__ here and then over-riding it when we tackle layouts, we can iterate over both layouts and their children in a single call. This makes it easy to look for layout children :
So with all those methods added the base Control class looks like this:
classControl(Styled,BindableObject):''' Base class for all mGui controls. Provides the necessary frameworks for CtlProperty and CallbackProperty access to the underlying widget. NOTE this is not exactly identical to the code on github - more advanced stuff is removed to make the progression clearer '''CMD=cmds.control_ATTRIBS=['annotation','backgroundColor','defineTemplate','docTag','enable','enableBackground','exists','fullPathName','height','manage','noBackground','numberOfPopupMenus','parent','popupMenuArray','preventOverride','useTemplate','visible','visibleChangeCommand','width']_CALLBACKS=['dragCallback','dropCallback','visibleChangeCommand']_READ_ONLY=['isObscured','popupMenuArray','numberOfPopupMenus']__metaclass__=ControlMetadef__init__(self,key,*args,**kwargs):self.Key=keyself.Widget=self.CMD(*args,**_style)''' Widget is the gui element in the scene '''self.Callbacks={}''' A dictionary of Event objects '''Layout.add_current(self)defregister_callback(self,callbackName,event):''' when a callback property is first accessed this creates an Event for the specified callback and hooks it to the gui widget's callback function '''kwargs={'e':True,callbackName:event}self.CMD(self.Widget,**kwargs)def__nonzero__(self):returnself.existsdef__repr__(self):ifself:returnself.Widgetelse:return"<deleted UI element %s>"%self.__class__def__str__(self):returnself.Widgetdef__iter__(self):yieldself
You’ll notice that it is inheriting from two classes we have not touched on, Styled and BindableObject. Those don’t interact with what we’re doing here - they’ll come up in a later post. You can pretend it just says ‘object’. If you’re reading the code carefully you’ll probably spot a little bit of code I haven’t described. register_callback is there to support event proxies – we’ll talk about the details when we get to event proxies in the future.
Despite my rather verbose way of describing it all, this is not a lot of code. Which is what exactly you want in a base class: simple, common functionality, not rocket science. Hopefully, though, adding those pythonic behaviors will save a lot of waste verbiage in production work.
Damn, the internet has a lot of time on its hands
All Your Children Are Belong To Parent Layout
There’s one little bit of plumbing in Control that is worth calling out:
Layout.add_current(self)
That’s way of making sure that we can store references to our control wrappers in our layout wrappers - that is, when you create a wrapped button inside a wrapped columnLayout, the columnLayout has a handle to the wrapper class for the button. Which brings us around neatly to the wrapper class for layouts - called… wait for it… Layout.
To support nesting, we want our Layout wrapper class to be a context manager. The idea is that you when you start a Layout, it declares itself the active layer and all GUI controls that get created add themselves to it; when you’re done with it control is return to whatever Layout was active before. As Doctor Who says of bow ties, “Context Managers are cool.”
If you’ve done a lot of Maya GUI you know it’s also nice to have the same functionality for menus as well. So, to avoid repeating ourselves let’s start by creating a generic version of Control that works as a context manager so we can get identical functionality in windows, layouts and menus. Then we can inherit it into a wrapper class for layouts and another for windows and voila, they are all context managers without cutting and pasting. Here’s the abstract base class for all ‘nested’ classes: menus, windows, layouts etc:
classNested(Control):''' Base class for all the nested context-manager classes which automatically parent themselves '''ACTIVE_LAYOUT=Nonedef__init__(self,key,*args,**kwargs):self.Controls=[]super(Nested,self).__init__(key,*args,**kwargs)def__enter__(self):self.__cache_layout=Nested.ACTIVE_LAYOUTNested.ACTIVE_LAYOUT=selfreturnselfdef__exit__(self,typ,value,traceback):self.layout()Nested.ACTIVE_LAYOUT=self.__cache_layoutself.__cache_layout=Nonecmds.setParent("..")deflayout(self):''' this is called at the end of a context, it can be used to (for example) perform attachments in a formLayout. Override in derived classes for different behaviors. '''returnlen(self.Controls)defadd(self,control):path_difference=control.Widget[len(self.Widget):].count('|')-1ifnotpath_difference:self.Controls.append(control)ifcontrol.Keyandnotcontrol.Key[0]=="_":ifcontrol.Keyinself.__dict__:raiseRuntimeError('Children of a layout must have unique IDs')self.__dict__[control.Key]=controldefremove(self,control):self.Controls.remove(control)k=[kfork,vinself.__dict__.items()ifv==control]ifk:delself.__dict__[k[0]]def__iter__(self):foriteminself.Controls:forsubinitem:yieldsubyieldself@classmethoddefadd_current(cls,control):ifcls.ACTIVE_LAYOUT:Nested.ACTIVE_LAYOUT.add(control)
All that really does is pop the current Nested onto a stack and make it possible for other controls to add themselves to the instance on top of the stack.
Here’s the concrete implementation for actual Layout classes:
This is just a regular mGui class (it gets all of the metaclass behavior from Control, via Nested) with added properties for common layout properties like numberOfChildren.
While we’re messing with contexts, this is also a great opportunity to do what PyMel already does and make all layouts automatically manage UI parenting. This gets rid of all those irritating calls to setParent(“..”), and lets us write GUI code that looks like real Python and not a plate of spaghetti. Compare this wordy cmds example:
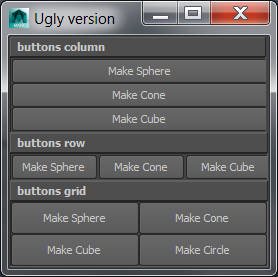
frommGui.guiimport*# note the caps: all of these are wrapper objects, not maya.cmds!window=Window('main window',title="How's this")withColumnLayout('gui',width=256)asgui:withFrameLayout("t_buttons",label="buttons column"):withColumnLayout("col"):Button('mkSphere',label="Make Sphere")Button('mkCone',label="Make Cone")Button('mkCube',label="Make Cube")withFrameLayout("r_buttons",label="buttons row"):withRowLayout("row",numberOfColumns=3):Button('mkSphere',label="Make Sphere")Button('mkCone',label="Make Cone")Button('mkCube',label="Make Cube")withFrameLayout("g_buttons",label="buttons grid"):withGridLayout("grid",numberOfColumns=2):Button('mkSphere',label="Make Sphere")Button('mkCone',label="Make Cone")Button('mkCube',label="Make Cube")Button('mkCircle',label="Make Circle")
That example also includes one other neat way to leverage contexts too. If you double check the add method in Nested you’ll see that it adds child wrapper objects to it’s own __dict__. That makes them accessible without having to explicitly store them. In this example, you could get to the last sphere-making button in this example as gui.g_buttons.grid.mk_sphere without having to manually capture the name of the underlying widgets they way the first example must. Since Maya GUI is always a single-rooted hierarchy, as long as you know the first parent of a window or panel you can always get to any of its the child layouts or controls. This saves a lot of the boring boilerplate you would otherwise need to do just keeping track of bits and pieces.
There’s one little extra bit of magic in there to let the add method discriminate between children you care about and those you don’t. If your child controls have no key set, they won’t be added to the __dict__. On a related note, you can also be tricksy and add a control which is not a direct child of the layout - for example, if you had a layout with a list of widgets in a scrollLayout, you don’t usually don’t care about the scrollbar - it’s just along for the ride. So you can add the widgets directly to the ‘real’ parent layout and keep the paths nice and trim. The goal, after all, is to make the gui layout a logical tree you can work with efficiently. There’s a practical example of this trick in the lists.py file on Github
Here’s a snippet tacked on to the end of that last sample showing how you can use the iterability of the layouts to set properties in bulk. You can see how the work of turning command-style access into property style access, combined with the extra clarity we get from context managers, really pays off:
# using the iterability of the layout to set widths foritemingui.t_buttons:item.width=256foritemingui.r_buttons.row:item.width=85item.width=256# the last item is gui.r_buttons.row itselfitem.columnWidth3=(85,85,85)# dittoforitemingui.g_buttons.grid:item.width=128item.width=256# now the last item is the griditem.cellWidth=128cmds.showWindow(window)
I don’t even want to think about the equivalent code in cmds!
One parting note about the naming scheme, It does have one, inevitable drawback: it means that the child wrappers have unique names inside a given context. Not much we can do about that. They can, however, have the same name under different parents - the example above has , gui.t_buttons.grid.mk_sphere, and gui.g_buttons.grid.mk_sphere Thats a useful thing to exploit if you want to, say, find all of the ‘Select’ buttons on a form and disable them or something off that sort.
Make All Zig!
Hopefully, the combination of some syntax sugar in our wrappers and turning layouts into context managers will make Maya GUI layout less of a pain in the butt. However, we still need to actually crank out all the wrappers for all those scores of classes in the maya GUI library. Descriptors and metaclasses are powerful tools, but few of us have the intestinal fortitude to plow through the dozens of classes in the Maya GUI library getting every flag and command correct.
In an ideal world we’d have a way of reflecting over some kind of assembly information and extracting all of the maya GUI commands with their flags and options. Of course, in an ideal world we would not have to do this in the first place, since the native GUI system would not be the unfortunate SNES-era mishmash that it is.
Mass production is a pain in the ass.
Luckily, the TA spirit cannot be kept down by adversity. In this case we don’t have a nice clean api but we do have MEL.... poor, neglected, wallflower MEL. Well, here’s a chance for the wallflower to save the party: MEL’s help command can list all of the commands and all of the flags in Maya. So, what we need to do is to run through all of the Mel commands in help, find the ones that look like GUI commands, and capture their command - flag combinations as raw material for our metaclass control factory.
See? This was getting all programmery, but now we’re back in familiar TA spit-and-bailing-wire territory. Comfier?
The actual code to build the wrappers isn’t particularly interesting (its here if you want to see it). In two sentences: Use the mel help * command to find all of the commands in Maya which share flags with cmds.control or cmds.layout. Then collect their flags to make the list of class attributes that the metaclass uses to create property descriptors. The final output will be a big ol’ string of class definitions like this:
classFloatSlider(Control):'''sample output from mGui.helpers.tools.generate_commands()'''CMD=cmds.floatSlider_ATTRIBS=['horizontal','step','maxValue','value','minValue']_CALLBACKS=['changeCommand','dragCommand']
We generate two files, one for controls and one for layouts (that’s an arbitrary design call on my part, you could of course have one file). Now they’re just sitting on disk as if we’d written them by hand. We can import our newly generated modules and away we go, with nice pythonic properties and our new functions.
There is one judgement call here that is worth mentioning in passing.
The logic in the helper modules which generate this is all deterministic, it doesn’t need human intervention so it could actually be run at module load time rather than being run and dumped out to a file. For what I want to do, I felt that physical files were a better choice, because they allow the option of hand tailoring the wrapper classes as the project evolves. Plus, the startup cost of trolling through every MEL command, while it’s not very big, is real and it seems good to avoid it. I’ve have heard enough grumbling over the years about PyMel’s startup speed that I thought it wisest to opt for speed and clarity over fewer files on disk.
One nice side effect of generating our wrappers this way: we’ve added some functionality through our base classes but fundamentally we’ve kept the same names and options we already know from plain old maya.cmds. The only changes are the mandatory names and the fact that I’ve capitalized the class names to make them more pep-8-friendly.
Hopefully, keeps the learning curve short for new user. Its hard enough to pick up a new style, making you memorize hundreds of new property names seem like a big tax on users.
In the version up on Github (and in this example) I opted to use only the long name for the properties. This is definitely a matter of taste; I’m sure that many TAs out there are sufficiently familiar with the old maya command flags that a howler like cmds.rowLayout(nc=2, cw2=(50,100), ct2=('both', 5), bgc = (.8,.6,.6), cl2=("left", "right") makes its meaning clear. for my part, though, the long names clarify the intent of the code enormously if you make a fairly small upfront investment in typing.
If you are of the opposite opinion, though, you can call the generate_helpers and generate_controls functions in mGui.helpers.tools with includeShortNames set to true make your own wrappers with the short flags too.
What You Say!!!
Now we’ve got a complete library of all the widgets. You can see the results in controls.py and layouts.py on GitHub. (The base classes are also up there for your perusal in the root of the core module). If all you want is to stop writing long commands every time you touch a GUI item, you’re done. You can write crisper layout code, tweak your properties, and so on with what we’ve covered so far. If you’re interested in making practical use of this setup – remember that WIP warning! – you should read the docs in the events.py module to make sure you know how to hook up callback events. I’ll cover that in more detail in the future.
However… Simpler syntax is just scratching the surface of what we can get up to now that we have a proper class library for our widgets. Next time out we’ll look at the event mechanism in more detail and talk about how to cleanly separate your functional code, GUI layouts, and the display styles of your widgets. Until next time....
Update 4/11/2015: Fixed the code examples which were blown away in the current Blogger template, and also dead image links
Last time out was devoted to a subject most TA’s already know: the shortcomings of Maya’s native GUI. This time we’re going to start looking at ways to rescue Maya from itself.
And if you don’t know what that picture is there, go here first - this tech-art stuff is not as important as a good understanding of Thunderbirds!).
With that out of the way:
Any good rescue mission starts with objectives. The three main drawbacks to coding in Maya GUI natively are nasty syntax, clunky event handling, and difficult management. In today’s thrill-packed episode, we’re going lay some foundations for tackling that old-school syntax and dragging Maya GUI kicking and screaming into the 21st century.
Under the surface
Composing a Maya GUI in code is annoying because the only way to access the properties of a Maya GUI node is via a command - there’s no way to get at the properties directly without a lot of command mongering.
Sure, the purist might say that alternatives are just syntax sugar - but Maya GUI’s drawbacks are are (a) an obstacle to readability (and hence maintenance) and (b) such a big turn off that people don’t bother to learn what native GUI can do. This is particularly true for formLayouts, which are the most useful and powerful - and also the least handy and least user-friendly - way of layout of controls in Maya. All the power is no use if you just stick with columnLayouts and hand-typed pixel offsets because setting things up takes a whole paragraph’s worth of typing.
So, the first thing I’d like to ponder is how to cut out some of the crap. Not only will a decent wrapper be more pleasant to read and write - at some point in the future when we get to talk about styling controls, real property access will be a big help in keeping things tidy. Plus, by putting a wrapper around property access we’ll have a built in hook for management and cleaning up event handling as well, even though that’s a topic for a future post.
The upshot of it all: we’re stuck with the under-the-hood mechanism, but there’s no reason we can’t wrap it in something prettier. Consider this simple example:
importmaya.cmdsascmdsclassExampleButton(object):CMD=cmds.buttondef__init__(self,*args,**kwargs):self.Widget=self.CMD(*args,**kwargs)@propertydefLabel(self):returnself.CMD(self.Widget,q=True,label=True)example=cmds.window()col=cmds.columnLayout()btn=ExampleButton("hello world")cmds.showWindow(example)printbtn.Label# hello world
@Label.setterdefLabel(self,val):returnself.CMD(self.Widget,e=True,label=val)# add this to the example above:btn.Label="Goodbye cruel world"
Rescuing the rescuers
While this is a nice trick, it doesn’t take long to figure out that replacing the whole Maya GUI library with this will take a lot of annoying, repetitive, and typo-prone code. cmds.button alone has 34(!) properties to manage, and real offenders like rowLayout have a lot more. Writing wrappers for all of these is a huge waste of valuable human brainpower
Luckily, that’s not the end. Property objects are really instances of Python descriptors, which means they are classes. And since they are classes, we have some more options for creating them.
The official docs on descriptors are kind of opaque, but the link I shared above to Chris Beaumont’s article on properties and descriptors does a great job of explaining what they do: which is, in a nutshell, to provide property like services in the form of class-level objects. (Update: here’s great five minute video too). Instead of defining methods and decorating them as we did above, you create a class which handles the function-to-property behavior (both getting and setting) and stick it directly into your own class namespace, the same way you would place a def or a constant (as an aside, this placement is why the CMD field in the example is a class field rather than a hard code or an instance property - it makes it easy for the descriptor to call the right cmds function and flags. We could make a separate class for cmds.floatField, for example, swapping out only the class level CMD parameter, and it would ‘just work’ the same way).
The gotcha to bear in mind with descriptors is that they are separate objects that live in the class, not instance members You don’t create them inside your __init__, you declare them in the class namespace. They don’t belong to individual instances - that’s why in the example below you’ll notice that self refers to the descriptor itself, and not to the ExampleButton class (this is how each descriptor in the example below remembers how to format it’s own call to the maya command under the hood).
The “bad” part of that is that you the descriptor is ignorant of the class instance to which it is attached when you call it. Pyhton will pass the instance in to the descriptor, as you’ll see in the example below. The good part, on the other hand, is that the descriptor itself can (if need be) have a memory of its own - that’s why the descriptors in the next example can remember which flags to use when they call the underlying Maya GUI commands.
While this sounds scary, it’s mostly a minor mental adjustment - once you do a couple times it will be routine. And all the oddness is concentrated in the definition of the descriptor objects themselves - once the descriptor is actually declared, you access it just as if it were a conventional instance property and all is plain-jane foo.bar = baz.
Here’s the button example re-written with a couple of descriptors:
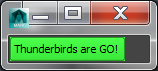
classCtlProperty(object):''' Property descriptor. When applied to a Control-derived class, invokes the correct Maya command under the hood to get or set values '''def__init__(self,flag,cmd):assertcallable(cmd),"cmd flag must be a maya command for editing gui objects"self.Flag=flagself.Command=cmddef__get__(self,obj,objtype):''' Class instance <obj> and its type <objtype> are passed in automatically. <self> is this descriptor object, NOT an owning class instance! '''ctrl=obj.Widgetifhasattr(obj,"Widget")elsestr(obj)returnself.Command(ctrl,**{'q':True,self.Flag:True})def__set__(self,obj,value):''' Again, the owning instance is passed in as <obj> automatically '''ctrl=obj.Widgetifhasattr(obj,"Widget")elsestr(obj)self.Command(ctrl,**{'e':True,self.Flag:value})classExampleButton(object):CMD=cmds.buttondef__init__(self,*args,**kwargs):self.Widget=self.CMD(*args,**kwargs)Label=CtlProperty('label',CMD)BackgroundColor=CtlProperty('bgc',CMD)# same example as before example=cmds.window()col=cmds.columnLayout()btn=ExampleButton("hello world")cmds.showWindow(example)btn.Label="Thunderbirds are GO!"btn.BackgroundColor=(.25,1,.25)
That’s more like it - only two lines of data-driven code where we used to have six (well, not counting CtlProperty - but thats a one time cost to be spread out over scads of different GUI classes later). It’s a lot easier to read and understand as well, and contains far fewer opportunities for typos.
But… we’re still talking 34 lines like that for cmds.button, and God knows how many for cmds.rowColumLayout.
Sigh.
Act III
No rescue drama is complete without a false climax, and this is ours. Despite the ominous music just before the commercial,. the situation is not really that bad. The last example shows that the problem is not really one of code any more, it’s just data. Since descriptors are objects, you can crank them out like any other object: provide a list of the appropriate flags for a given class and you can crank out the correct descriptors, as they say, “automagically.”
As long as you promise not to use that stupid word around me.
Fortunately for our rescue team, Python treats classes the same way it treats anything else: as objects that can be created and maniuplated.
If you use the Python builtin type on any Python class, you’ll get back type 'type'. In other words, a Python class definition is itself an instance of the class ‘type’. How… meta.
The reason this matters to us is that we can fabricate classes the same way fabricate other kinds of Python things. You would not hesitate to crank out a list of strings assembled in code: there’s no reason you can’t do the same thing for descriptors! You could do this by hand, creating type instances and filling them out yourself: types take three arguments: a string name, a list of parent types, and dictionary of named fields and propertis. Thus:
defconstructor(self,name):self.Name=nameexample=type('Example',(),{'__init__':constructor})Test=example("Hello world")# <__main__.Example object at 0x00000000022D6198>Test.Name# Hello world
However this would send you down a possible rabbit hole, since the idea we’re really chasing is a way to mass produce classes to make UI coding easier and it would not be very easy if all of the classes had to be coded up in this clunky way. Luckily Python has an obscure but extremely powerful mechanism designed for just this sort of problem. Because, you know, it’s the language of geniuses.
“Brains, Activate the Metaclass”
The helpful MacGuffin in this case it the Metaclass. _Metaclasses have a reputation - not _entirely undeserved - as deep voodoo. The most commonly circulated quote about them is that “If you can solve the problem without a metaclass, you should.”
However, in our case we really can’t solve the problem without some form of class factory. In particular, we need a way to bang out classes with the right collection of Descriptors to cover all of the zillions of flags in the Maya GUI system. So just this once we can put on the big blue glasses and lab coats and venture into the super secret lair of the mad metaclass scientists.
The job of a metaclass is to customize the act of class creation. When a class is first defined, python will pass the type it creates (that same object we played with in the last example) to the metaclass for further manipulation. The __new__ function of the metaclass will be called on the just-defined type, taking it name, parents and internal dictionary as arguments. The __new__ can fiddle with any of these as it sees fit before passing it along for actual use.
As you can imagine, this is a good time for PythonMan’s Uncle Ben to remind us that ‘with great power comes great responsibility’ – it’s easy to shoot yourself in the foot with a metaclass, since you can make changes to the runtime versions of your classes that will not be represented in your source files. Don’t just run off and meta all over everything in sight. A minimalist approach is the best way to stay sane.
But you’d probably like to see what this really looks like in practice. Here’s an example.
classControlMeta(type):
''' Metaclass which creates CtlProperty objects for maya gui proxies '''CONTROL_ATTRIBS = ['annotation', 'backgroundColor', 'defineTemplate',
'docTag', 'dragCallback', 'dropCallback', 'enable',
'enableBackground', 'exists', 'fullPathName', 'height',
'manage', 'noBackground', 'numberOfPopupMenus', 'parent',
'popupMenuArray', 'preventOverride', 'useTemplate', 'visible',
'visibleChangeCommand', 'width']
def__new__(cls, name, parents, kwargs):
''' __new__ is called then classes using this meta are defined. It will add all of the items in CONTROL_ATTRIBS to the new class definition as CtlProperty descriptor objects using the CMD field (a maya.cmds command) provied in the outer class. '''CMD = kwargs.get('CMD', None)
ifnotkwargs.get('CMD'):
CMD = parents[0].CMDforiteminControlMeta.CONTROL_ATTRIBS:kwargs[item] = CtlProperty(item, CMD)
returnsuper(ControlMeta, cls).__new__(cls, name, parents, kwargs)
The actual code is pretty simple. It takes the type object created by the ‘real’ class and grabs the contents of the CMD class field (remember that from the earlier examples?). Then it loops through its own list of command names and inserts them all into the new class as descriptors with the correct commands and the maya command that was stored in the command object. So our earlier button example becomes:
https://gist.githubusercontent.com/theodox/9106403/raw/60a06cba76748d7b157a5219349888f7b0bf0214/ButtonWithMeta.pyclassMetaButton(object):CMD=cmds.button__metaclass__=ControlMetadef__init__(self,*args,**kwargs):self.Widget=self.CMD(*args,**kwargs)w=cmds.window()c=cmds.columnLayout()mb=MetaButton("button1")cmds.showWindow(w)printmb.exists# We never had to add this one!# Trueprintmb.visible# or this# True
There is a minor problem with this very truncated example, however: there’s no label or command in the the metaclass, so the MetaButton has no button specific properties - only the generic ones in our list (which I made by trolling the flags for cmds.control, the ‘base class’ of all Maya control commands).
This is easily fixed by adding properties that are specific to buttons to a class field, and tweaking the metaclass to read and use them the same way it already uses the CMD class field. Like CMD, these are good class-level attributes since the collection of flags is shared by all buttons, fields or whatever.
classControlMeta(type):
''' Metaclass which creates CtlProperty objects for Control classes '''CONTROL_ATTRIBS = ['annotation', 'backgroundColor', 'defineTemplate', 'docTag',
'dragCallback', 'dropCallback', 'enable', 'enableBackground',
'exists', 'fullPathName', 'height', 'manage', 'noBackground',
'numberOfPopupMenus', 'parent', 'popupMenuArray', 'preventOverride',
'useTemplate', 'visible', 'visibleChangeCommand', 'width']
def__new__(cls, name, parents, kwargs):
CMD = kwargs.get('CMD', None)
_ATTRIBS = kwargs.get('_ATTRIBS',[]) # unique props from outer classifnotkwargs.get('CMD'):
CMD = parents[0].CMDforiteminControlMeta.CONTROL_ATTRIBS:kwargs[item] = CtlProperty(item, CMD)
foritemin_ATTRIBS:# now add in the outer class's unique props tookwargs[item] = CtlProperty(item, CMD)
returnsuper(ControlMeta, cls).__new__(cls, name, parents, kwargs)
classMetaButton(object):
CMD = cmds.button_ATTRIBS = ['label', 'command'] # button specific props__metaclass__ = ControlMetadef__init__(self, *args, **kwargs):
self.Widget = self.CMD (*args, **kwargs)
classMetaFloatField(object):
CMD = cmds.floatField_ATTRIBS = ['editable','precision','value','maxValue','step',
'minValue', 'changeCommand','dragCommand','enterCommand',
'receiveFocusCommand'] # this one has a lot of properties__metaclass__ = ControlMetadef__init__(self, *args, **kwargs):
self.Widget = self.CMD (*args, **kwargs)
As you can see, extending the automatic analysis is easy now that we know the basic trick. Just add a semi-private class field with the class specific attributes, and away we go!
In our next exciting episode…
I think this pretty much demonstrates that overhauling the Maya GUI toolkit is possible. However, in its current state it’s just a down-payment.
The combination of descriptors and metaclasses is an incredibly powerful tool and it’s not hard to see what comes next (it’s also easy to imagine similar setups for other problems which suffer from ugly imperative syntax). Now that we have a method for cranking out control widget classes by the bucketload, filling out the class library itself is pretty simple. There are, though, a few tricks we can use to make it better and less manual, as well as making sure it is complete. So, in a future outing, we’ll tackle a method for replicating the whole Maya command hierarchy in a more or less automatic way.
If you want to roll your own lightwieght properties library, this should give you enough tools to work with. If you’re more interested in actually doing GUI work without all the cmds crap, you should check out mGui, which is a library based on exactly this metaclass strategy to make GUI code more declarative and less ugly.
In the mean time,as we say at International Rescue Headquarters: F.A.B!